iPhone LIDAR Scan to Unity Real-Time Character
I have lots of experiencing leading teams that build highly accurate 3d representations and know the time it takes to get it right. I’ve spent years researching methods for modeling, shading, materials, and lighting in real-time scenarios and work hard to expand my technical and artistic limits. But, I wouldn't call myself a character artist.
I’ve tested many methods to decrease production time and have been intrigued by the potential of Photogrammetry and LIDAR. Initial tests with the Structure Sensor on an iPAD made it obvious that we’re entering an era where consumer friendly digital scanning is coming soon.
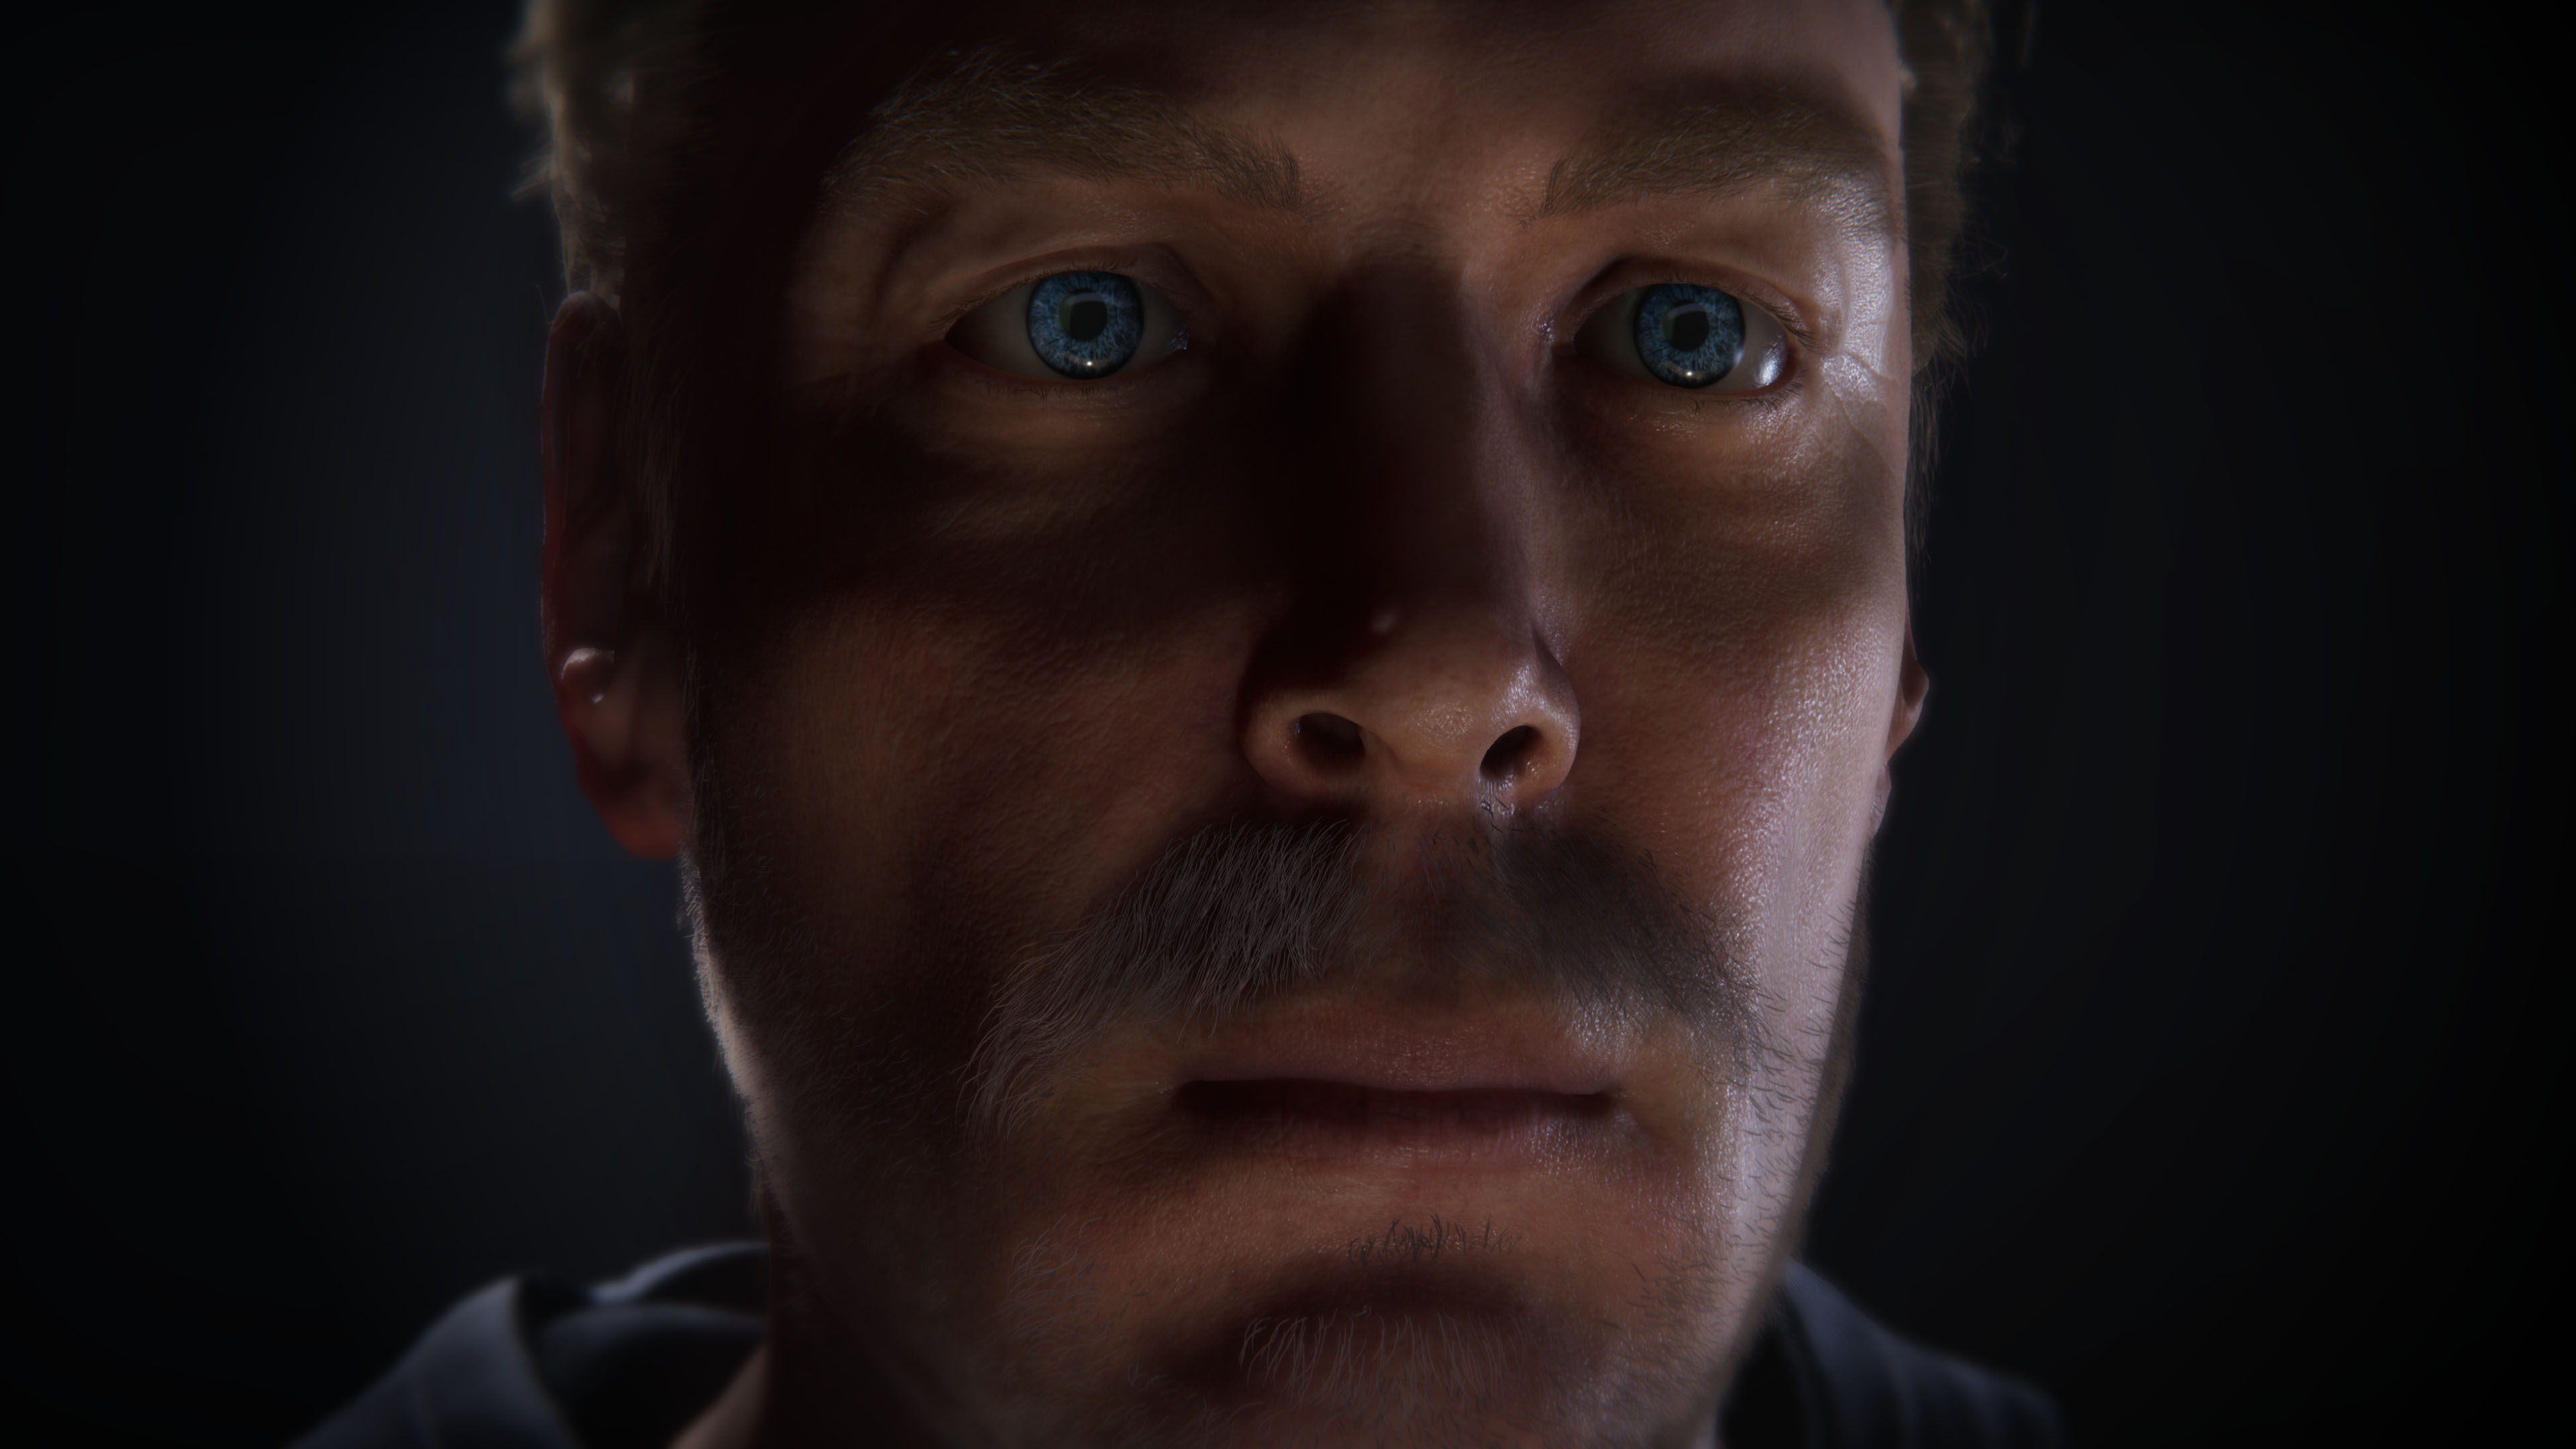
My goal was to use the iPhone 12 LIDAR feature to explore 3d scanning. Was it possible with a commercially available device to capture an asset that rivaled the quality of professional level scanning?
CREDITS:
Creative Director
Alexander Reyna
Role
Prototype, Asset Production, Shading, Lighting
Scanning and Cleaning
I wanted to better understand the challenges that people on my production team face when building synthetic characters. I went into this project hoping that LIDAR would provide an efficient approach for rapid production but quickly found the strengths and weakness of this approach.
I learned it’s very possible to create extremely accurate digital representations using phone based LIDAR, but there is a ton of work to make it look great.
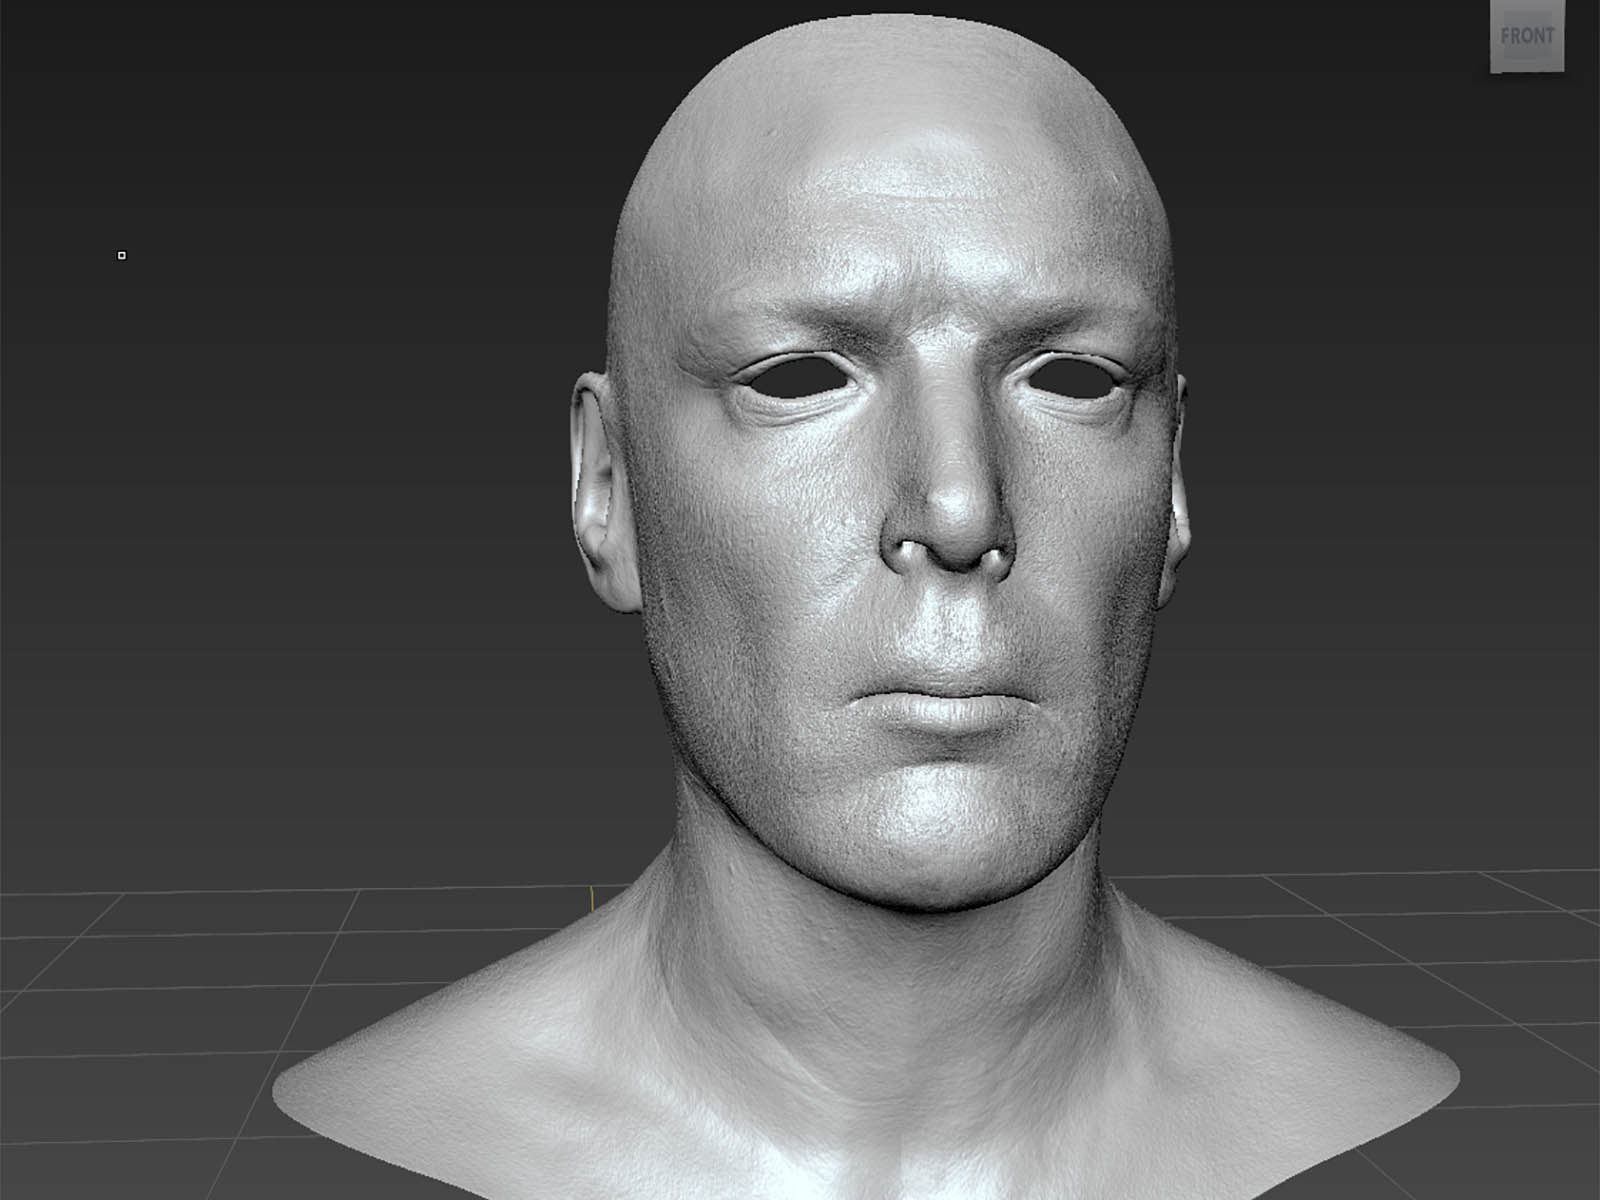
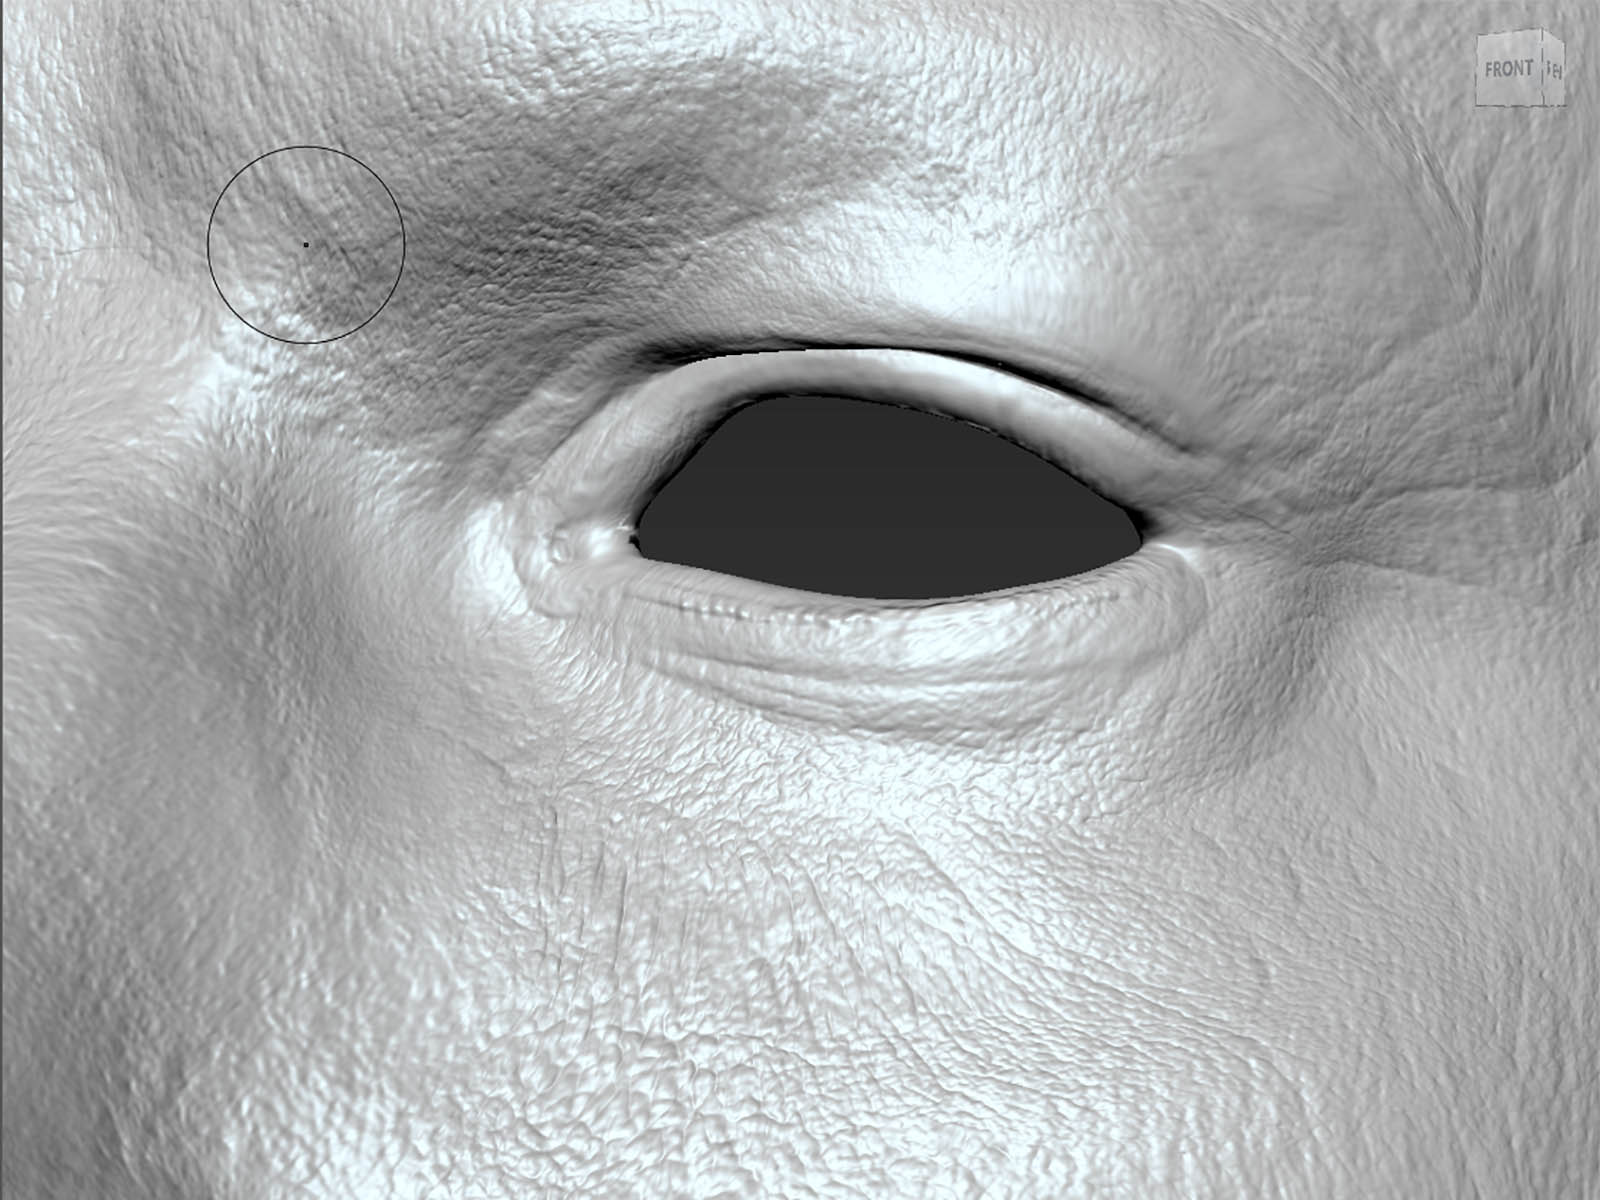
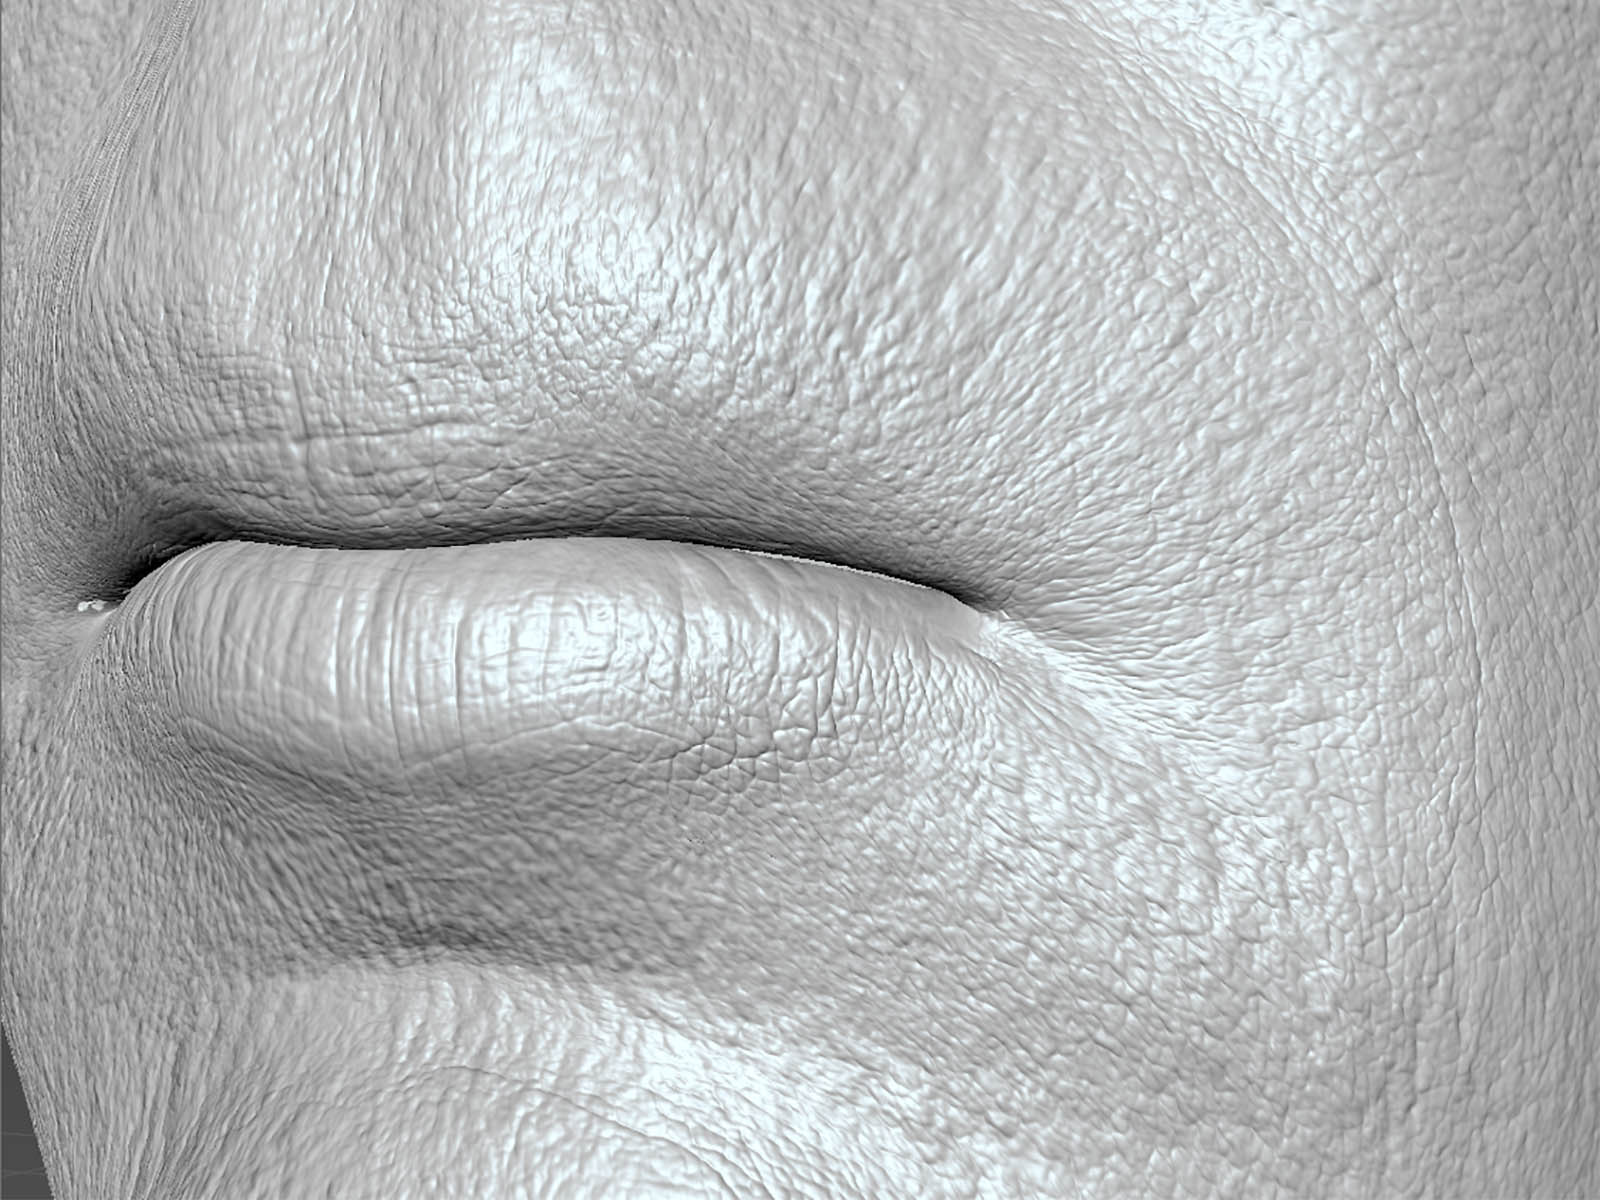
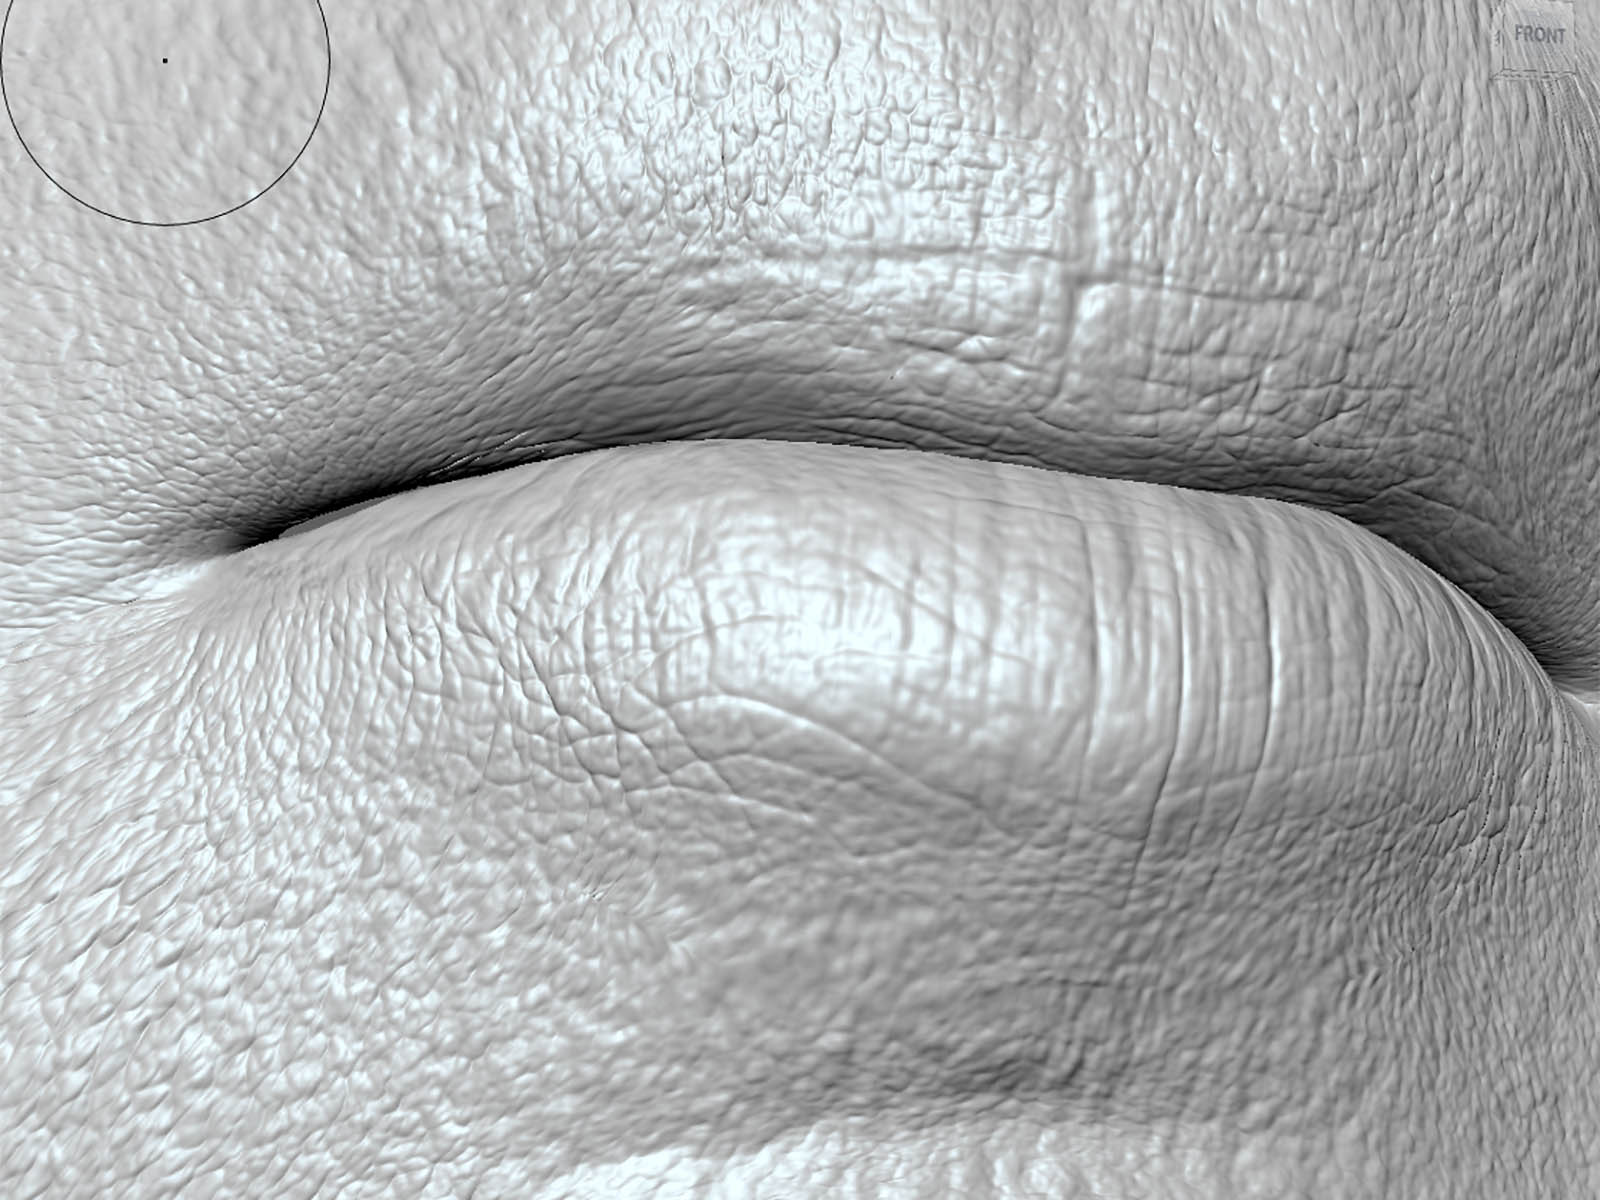
My initial tests used commercial software called Bellus on the iPhone that allowed the user to scan the entire body in one go. While this method created an airtight 3d model, the quality suffered and there was a distinct lack or realism in places where I couldn’t scan myself. The top of the head, behind the ears, and under the chin were obvious problems.
I switched to Capture software on iOS. Instead of trying to scan my entire head, I focused on smaller features, such as the mouth, nose, or ears with shorter sessions. Because this method resulted in lots of smaller point clouds, I used Meshlabs to align, merge, and clean. Once completed, I created a 3d mesh using Poisson Reconstruction and exported to Maya to begin re-topologizing.
This process took some time to complete, and I found that I had to keep cutting in extra details to create well-organized topology with enough geometry to make the ears, nose, eyes, and mouth look great. Once finished, I moved onto UV and began the process of sculpting details into the base model.
Sculpting
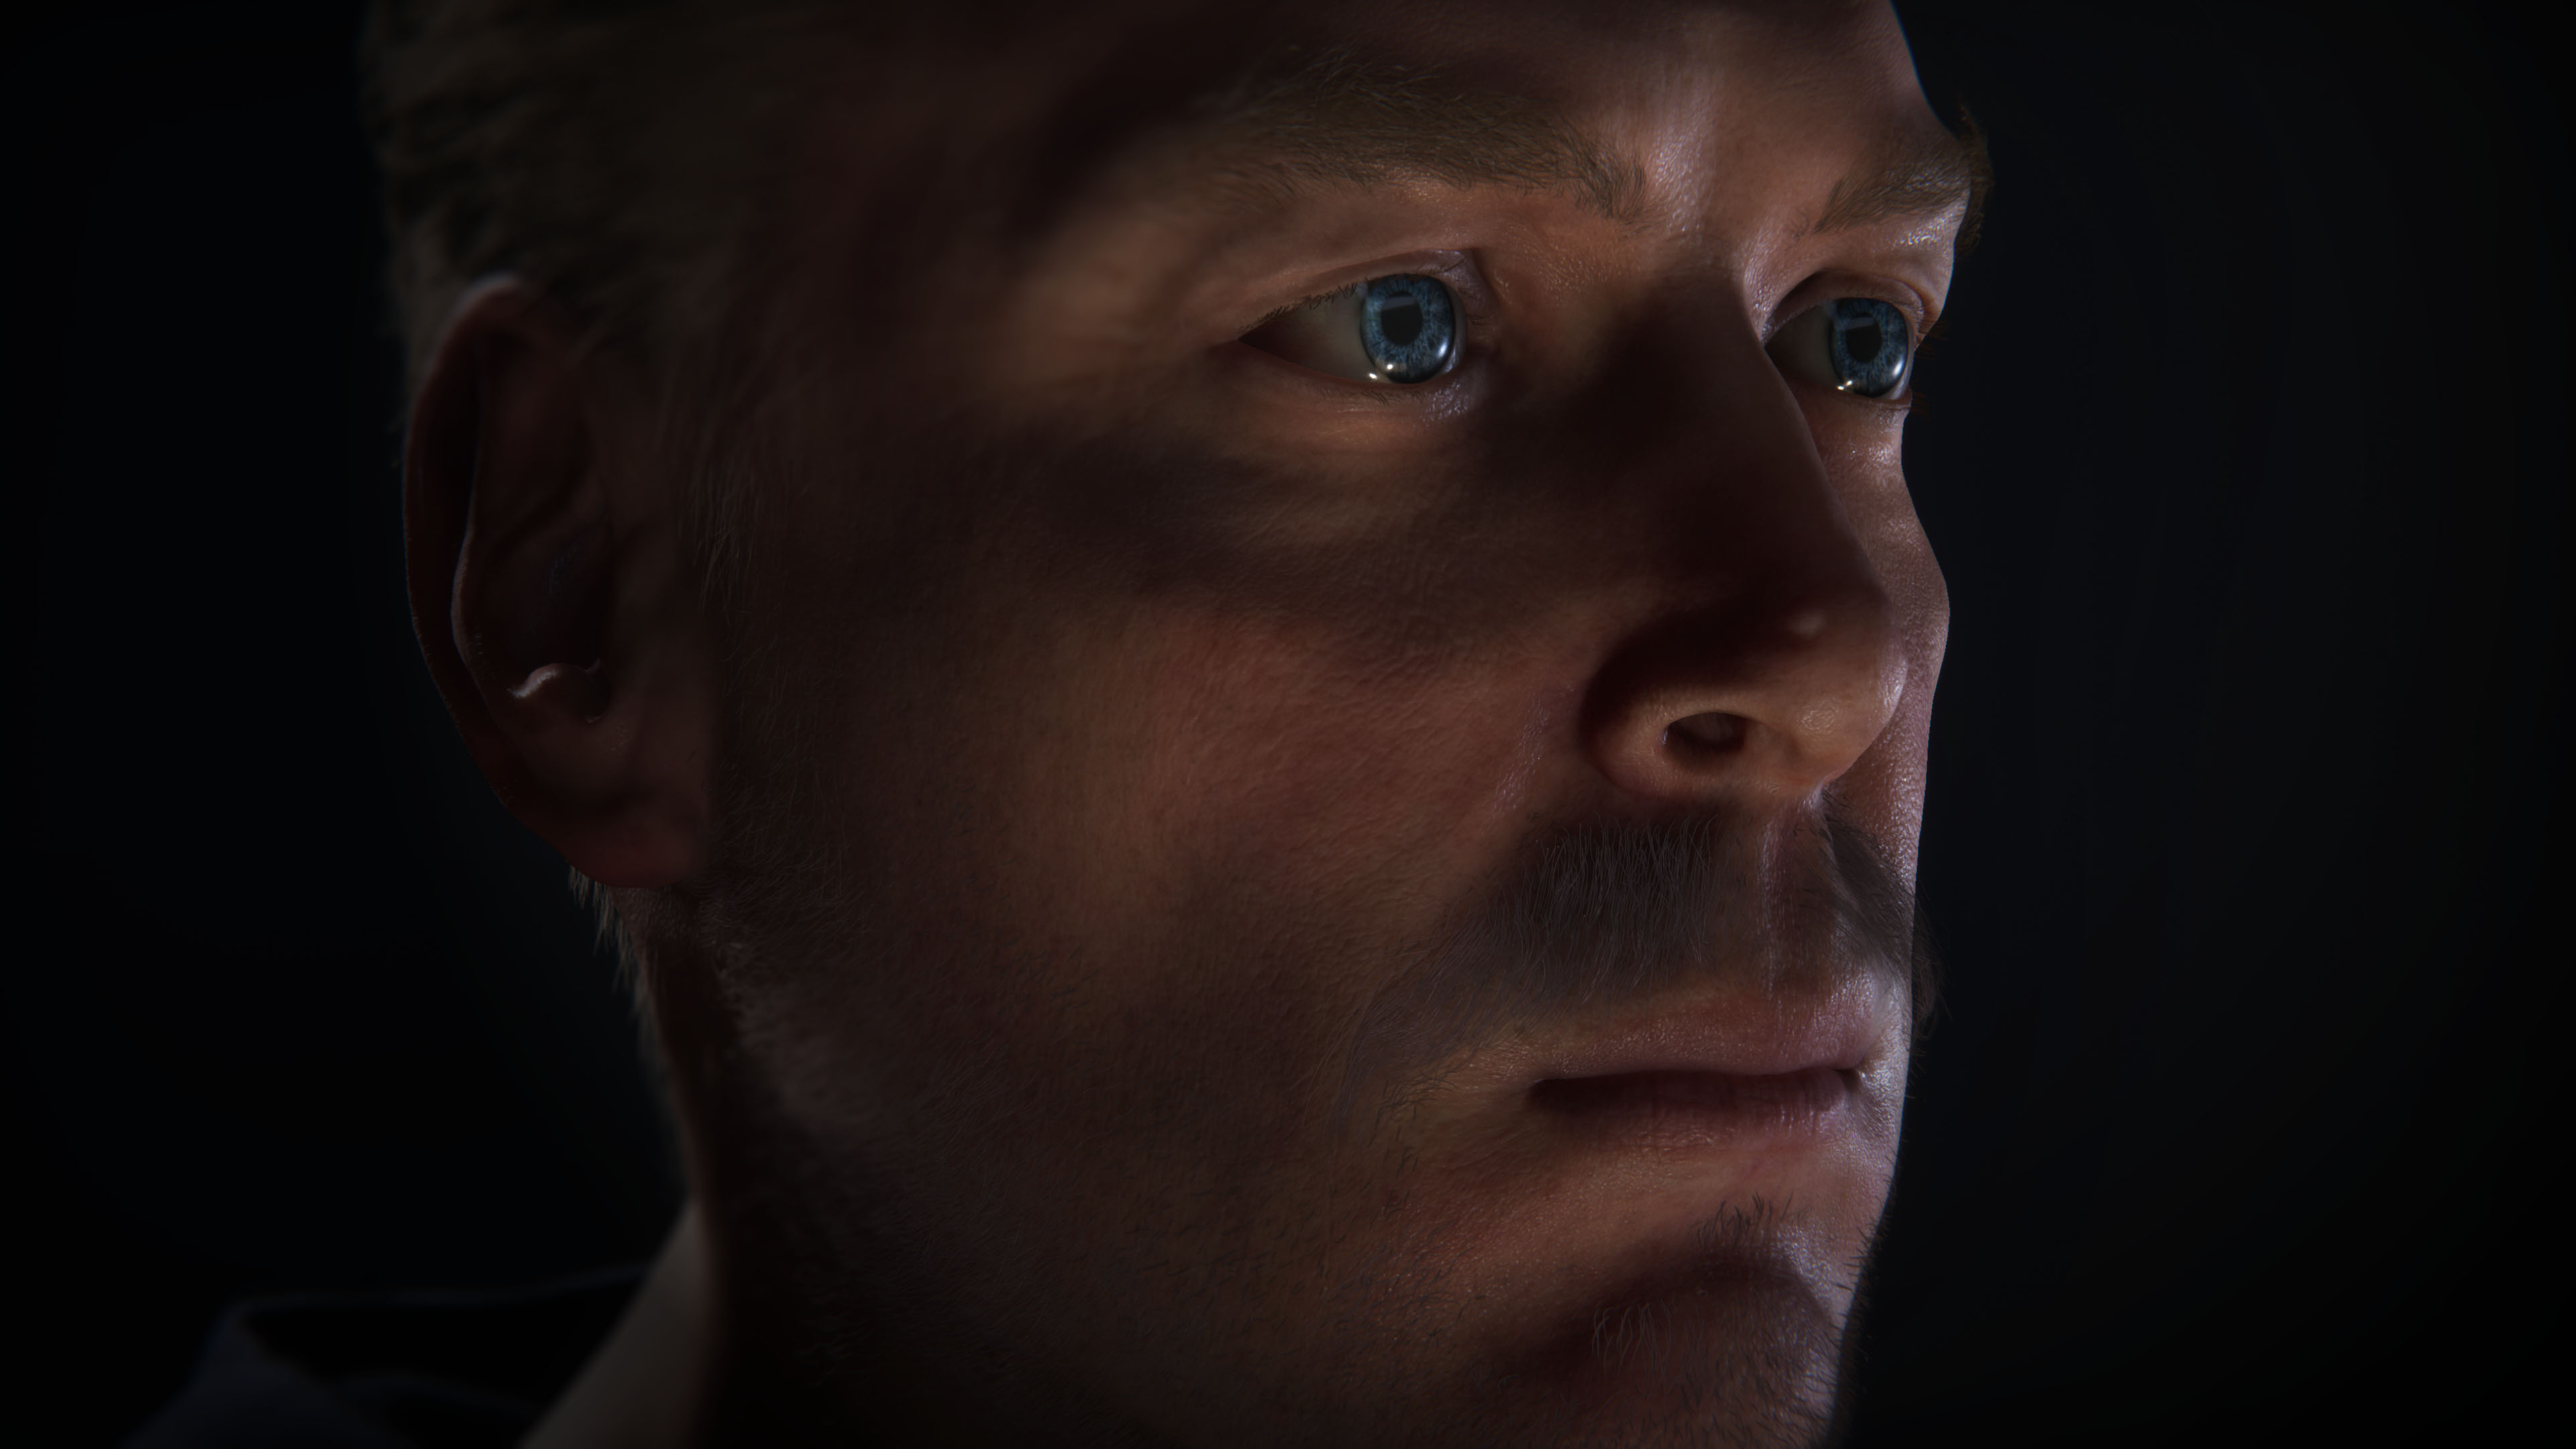
Because LIDAR on iPhone 12 is not accurate for pore level details, I was only able to use the albedo and vertex color of the mesh. This meant that I would need to sculpt microsurface details to add extra realism. For this process, I used Mudbox to sculpt and Substance to paint on top. Maps were exported via Painter @ 8K.
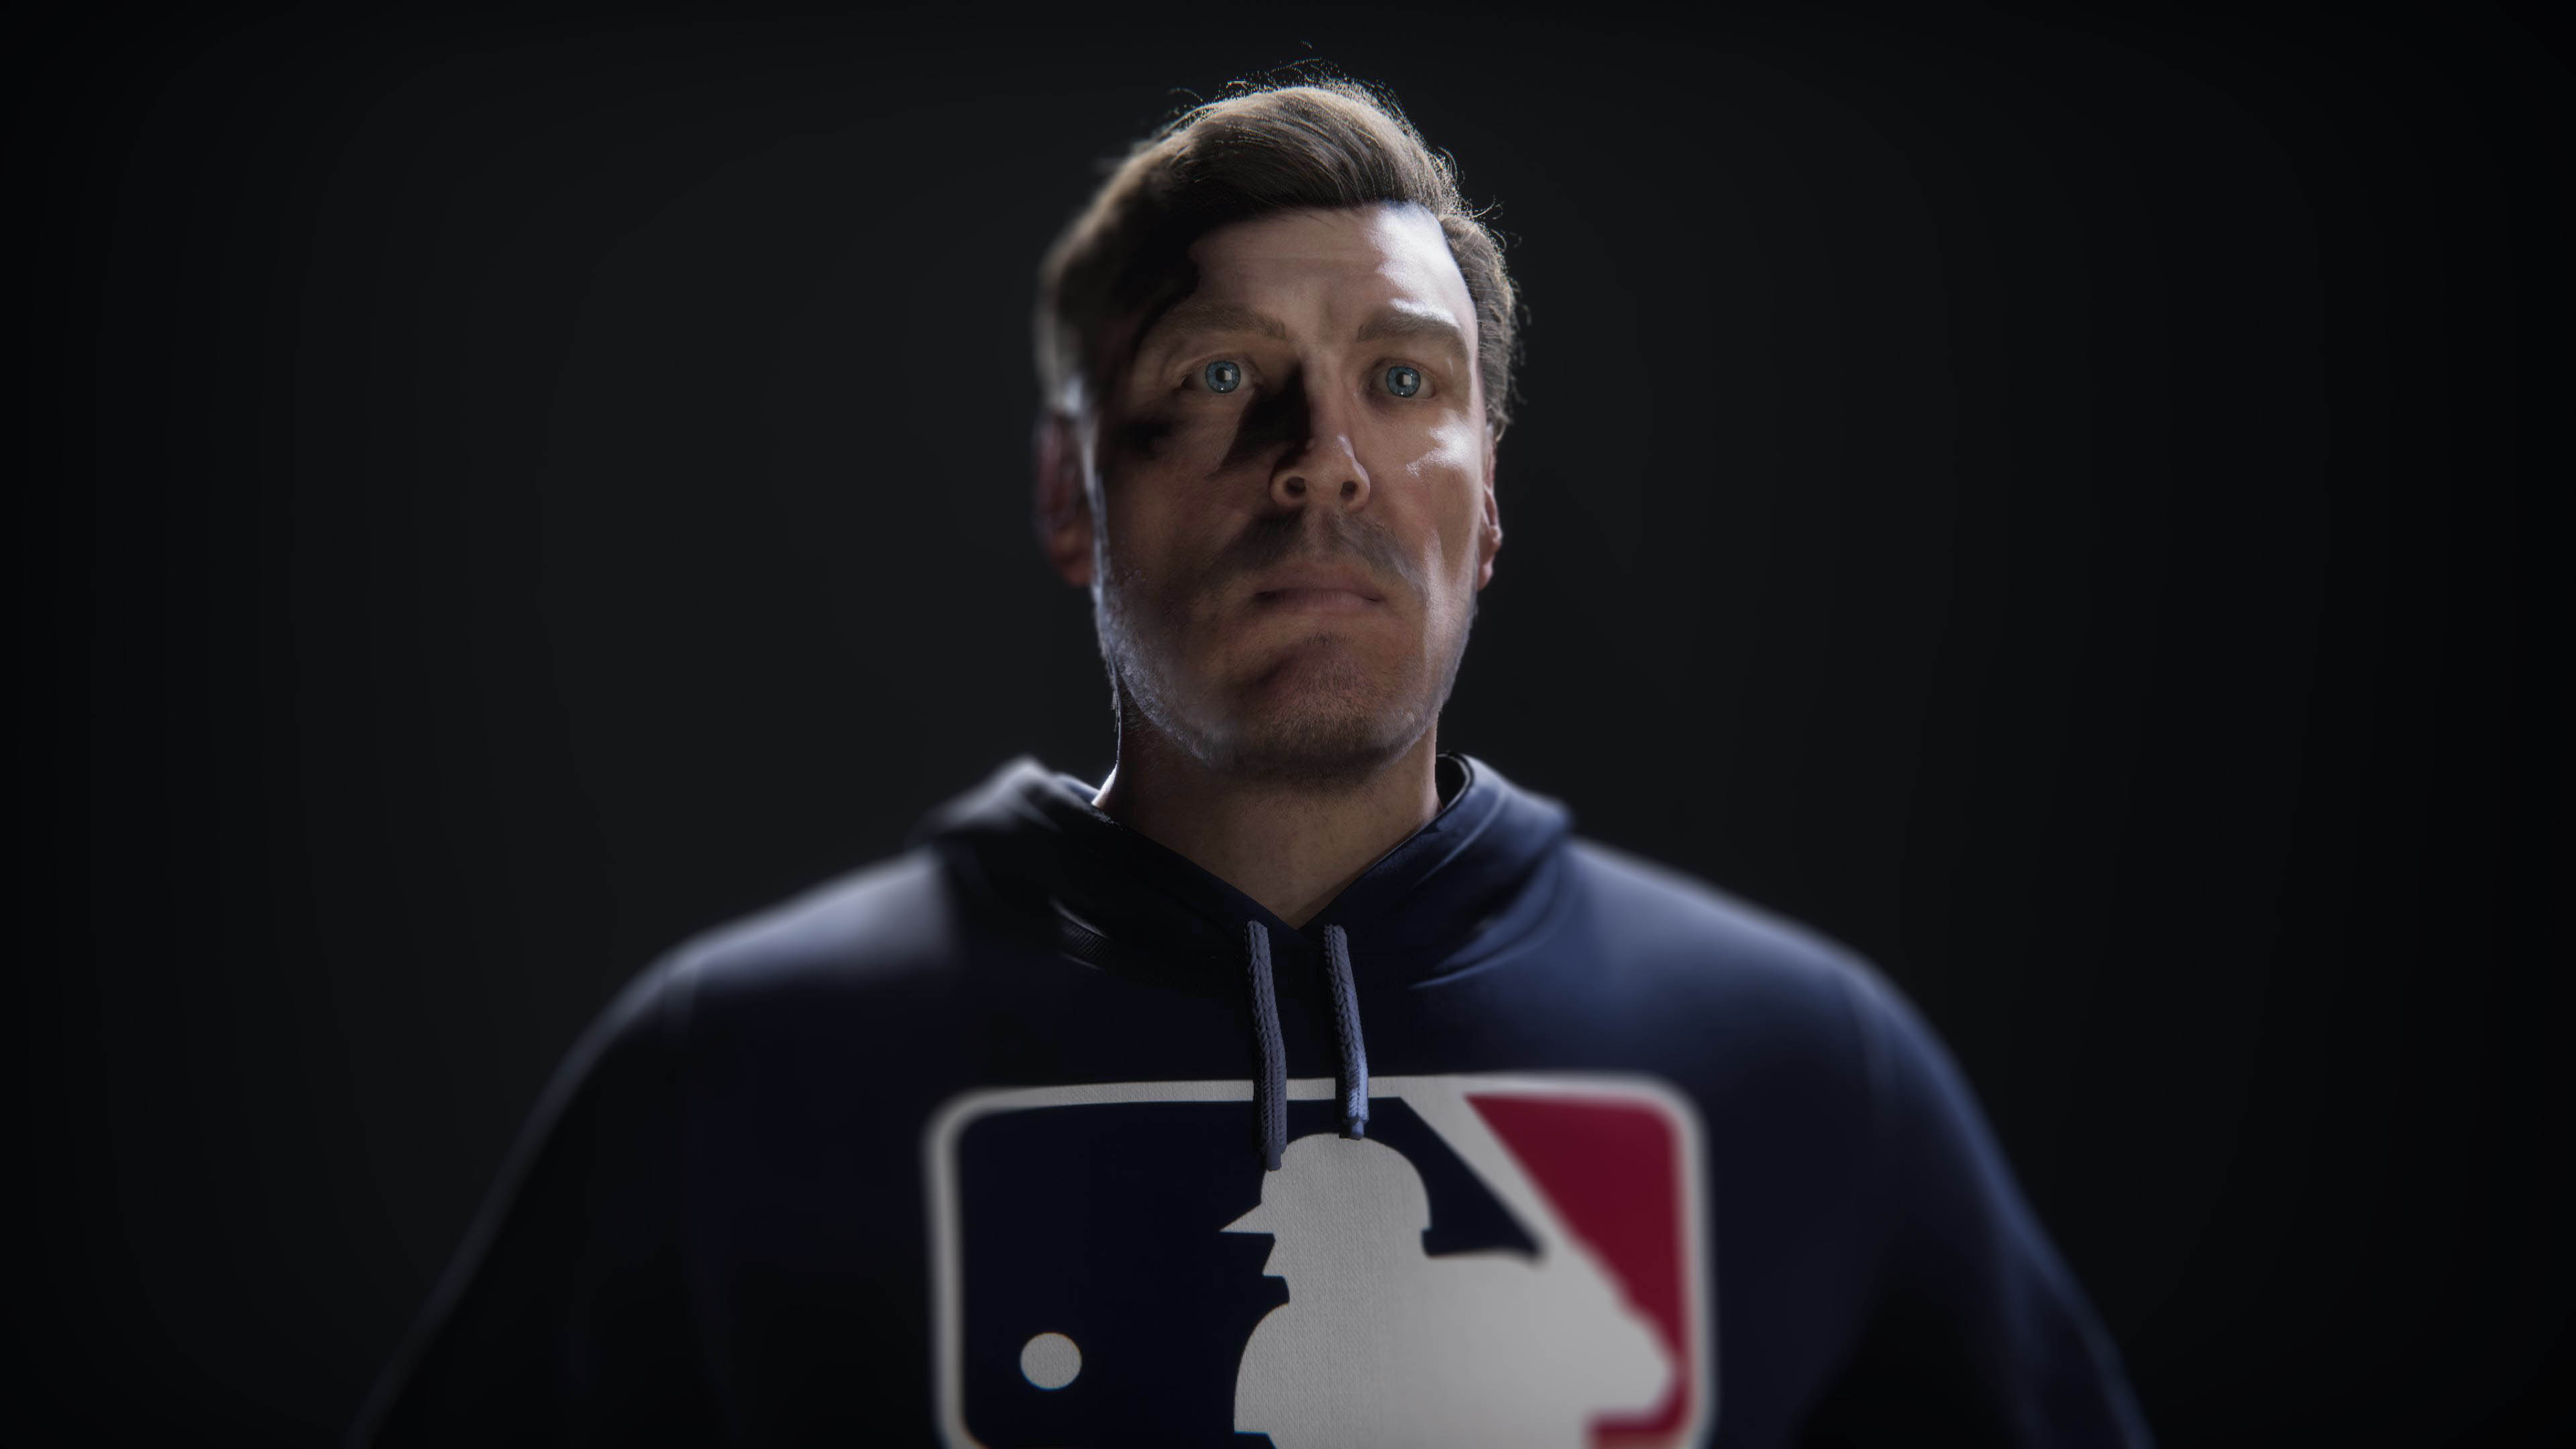
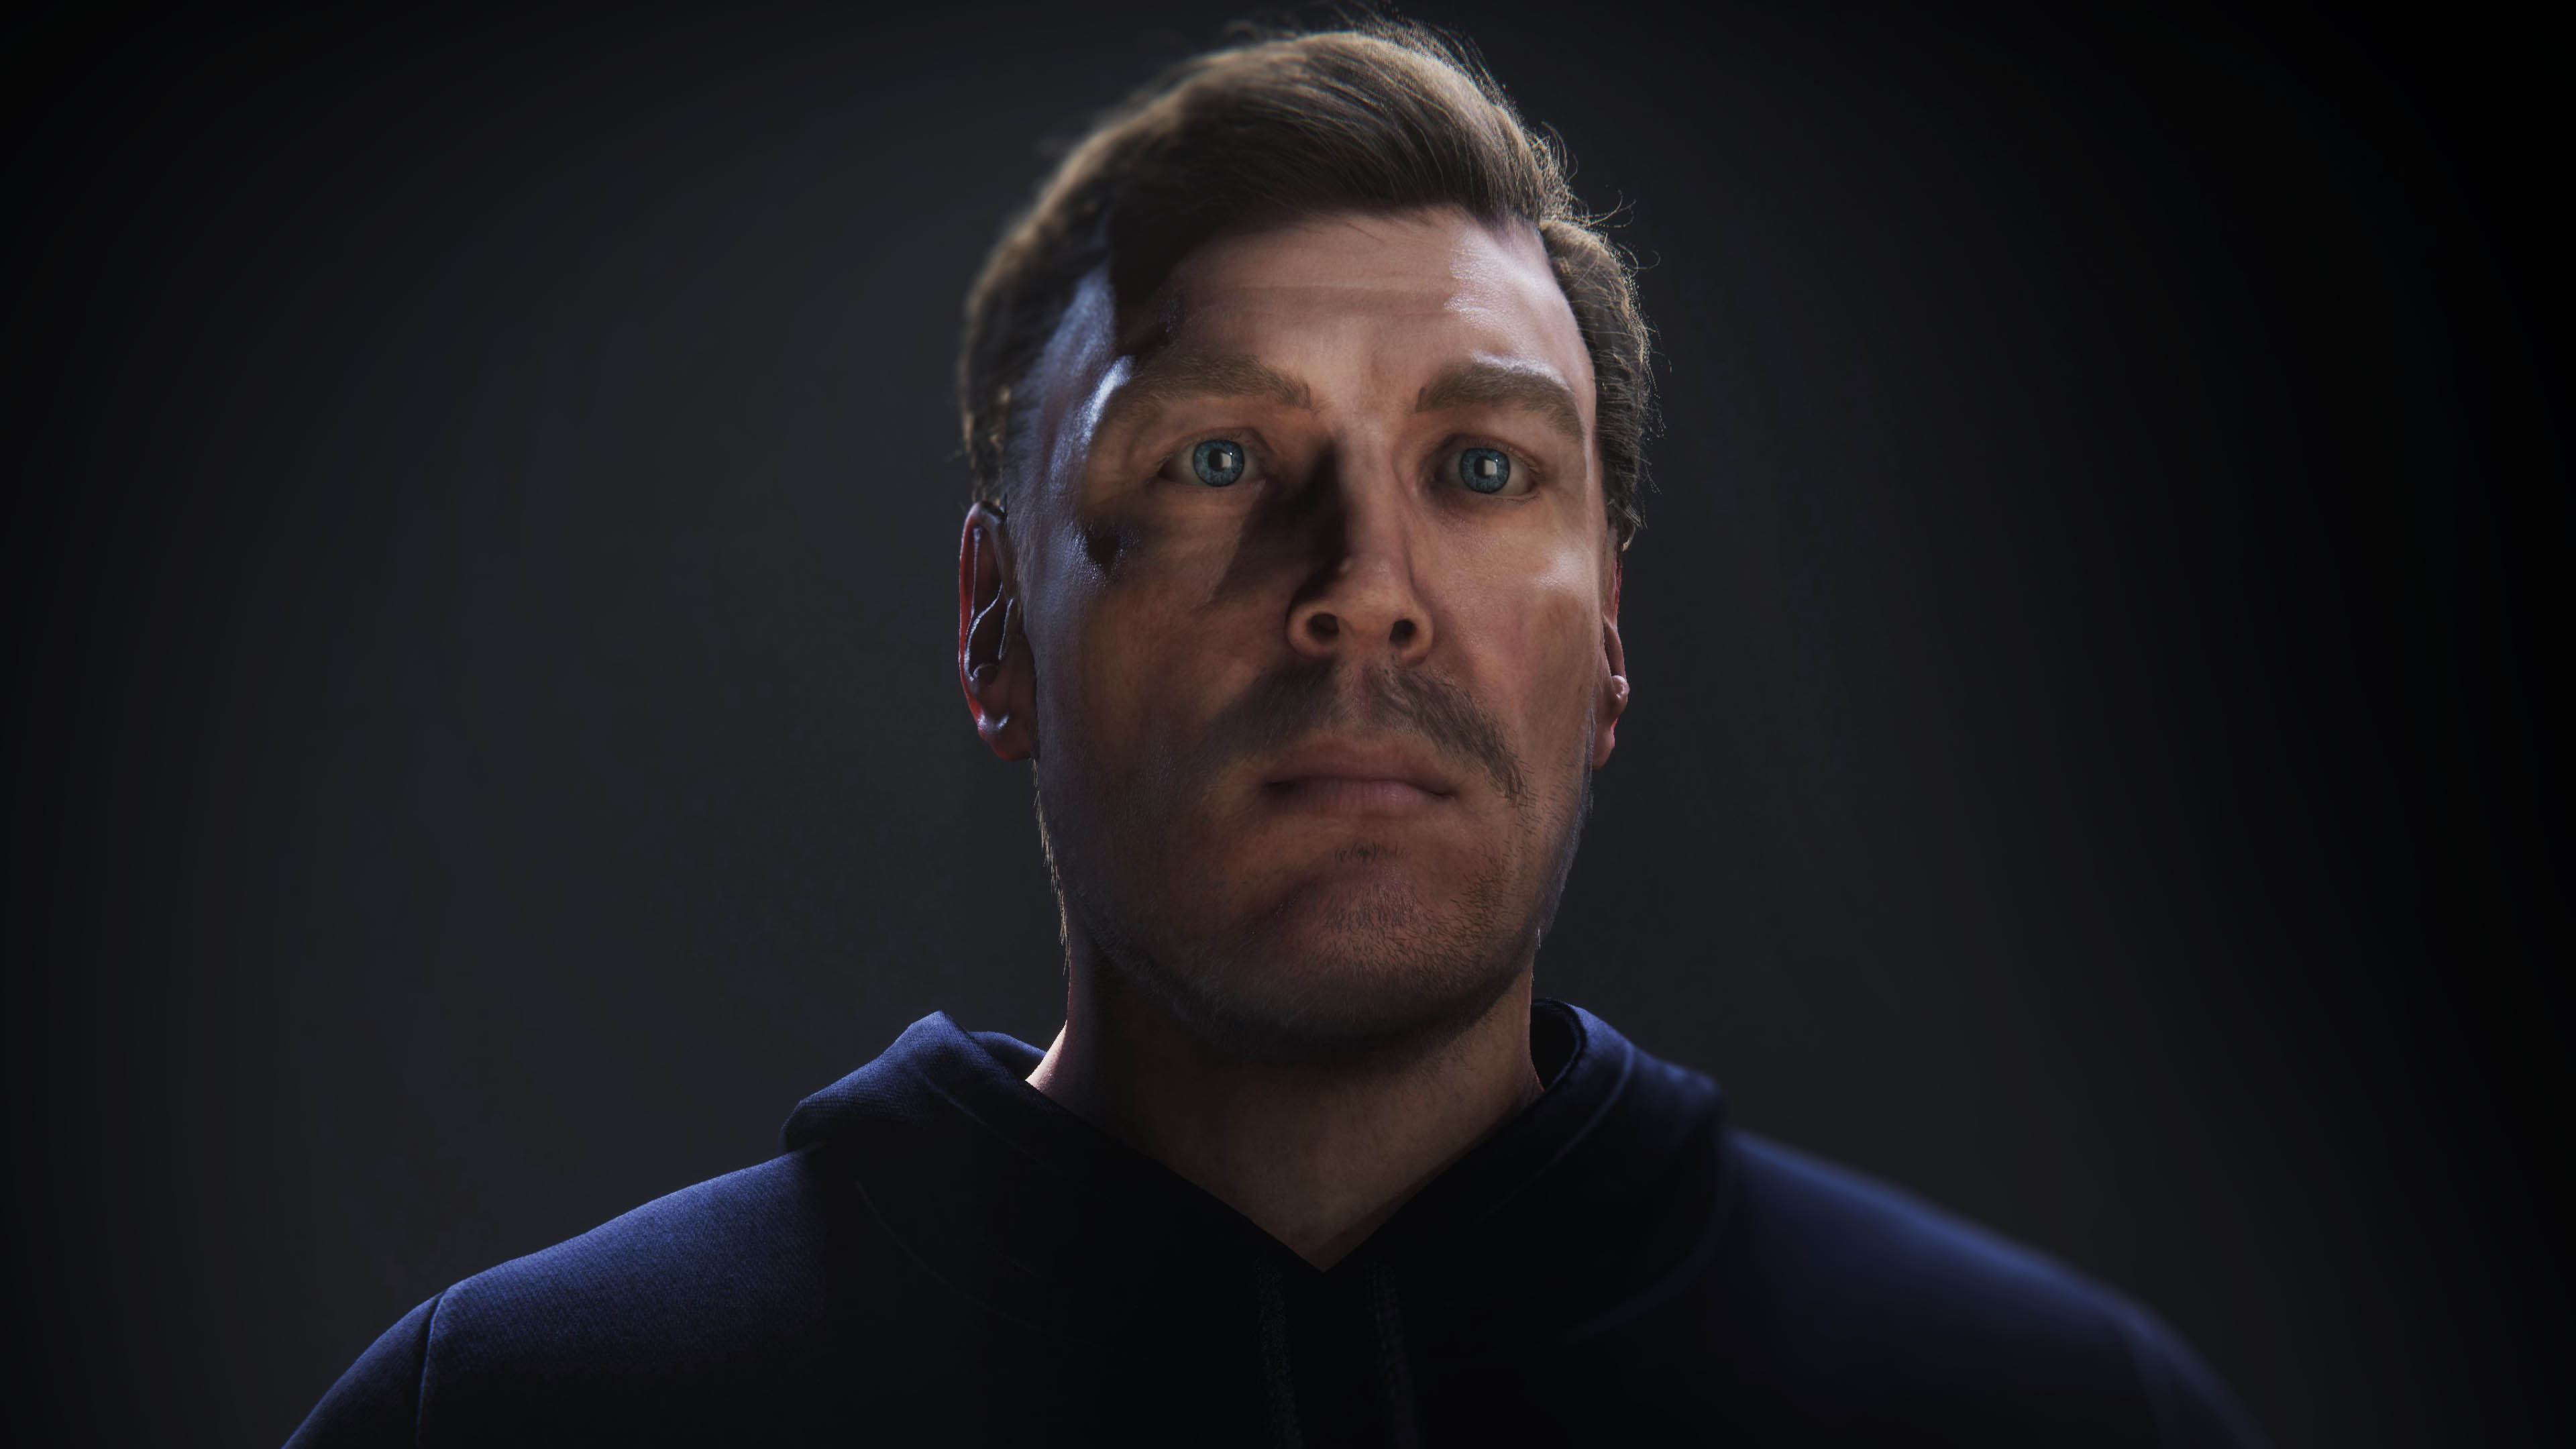
I knew that i’d use Unity for the real-time rendering of this demo project and had already spent time exploring the latest HDRP Digital Human samples which provide a great framework to check assets under a bunch of different photorealistic lighting and shading conditions.
Rapid prototype of my model and textures was simplified by working from the Gawain demo because I was able to quickly check map quality in the shader provided in the demo. Using initial settings, plus a little tweaking, let me make maps that felt fairly realistic with very little effort.
Once I had a skin look and feel that seemed right, I moved on to facial hair and hair card details.
Hair and Details
My next step was to think about the approach for producing realistic hair and facial hair. Because I had been aiming for photorealism, I realized that it would be challenging to create hair that looked great in a game engine but was specific enough to match my actual hair style.
Before I began, I did a bunch of research and looked at Digital Mike, Paragon Hair, and MetaHumans hair examples from Unreal. I also checked out the Heretic Demo from Unity which only consisted of stubble, brows, and lashes. Each of these projects handle hair (and facial hair) differently. Paragon was the most game engine friendly and had the simplest hair, using a multilayered collection of hair cards, while MetaHumans was much more detailed than Paragon but more manageable than individual hair strands in 3d. Digital Mike was hyper detailed with Hair and Vellus hair as actual 3d strands.
We already use tools like XGen and Ornatrix @ MLB to produce reasonable game ready hair. I wanted to explore blending LODs that allowed a rough form base layer, a midlayer of additional hair density, and a final LOD for breakaway “hero” strands with high poly individual strands.
Because I has a decent 3d scan of my head, I used QuadDraw in Maya to create a low poly LOD2 set of hair cards. This quickly created the general shape of my hair, but without much super fine detail. My next step was to use XGen to place hair guides to create a series of finer LOD1 hair cards. My final step was to use these hair guides to export a final set of LOD0 hair.
Once the hair was completed, I spent additional time modifying vertices and hand-placing hairs to ensure that strands felt as unique as possible.
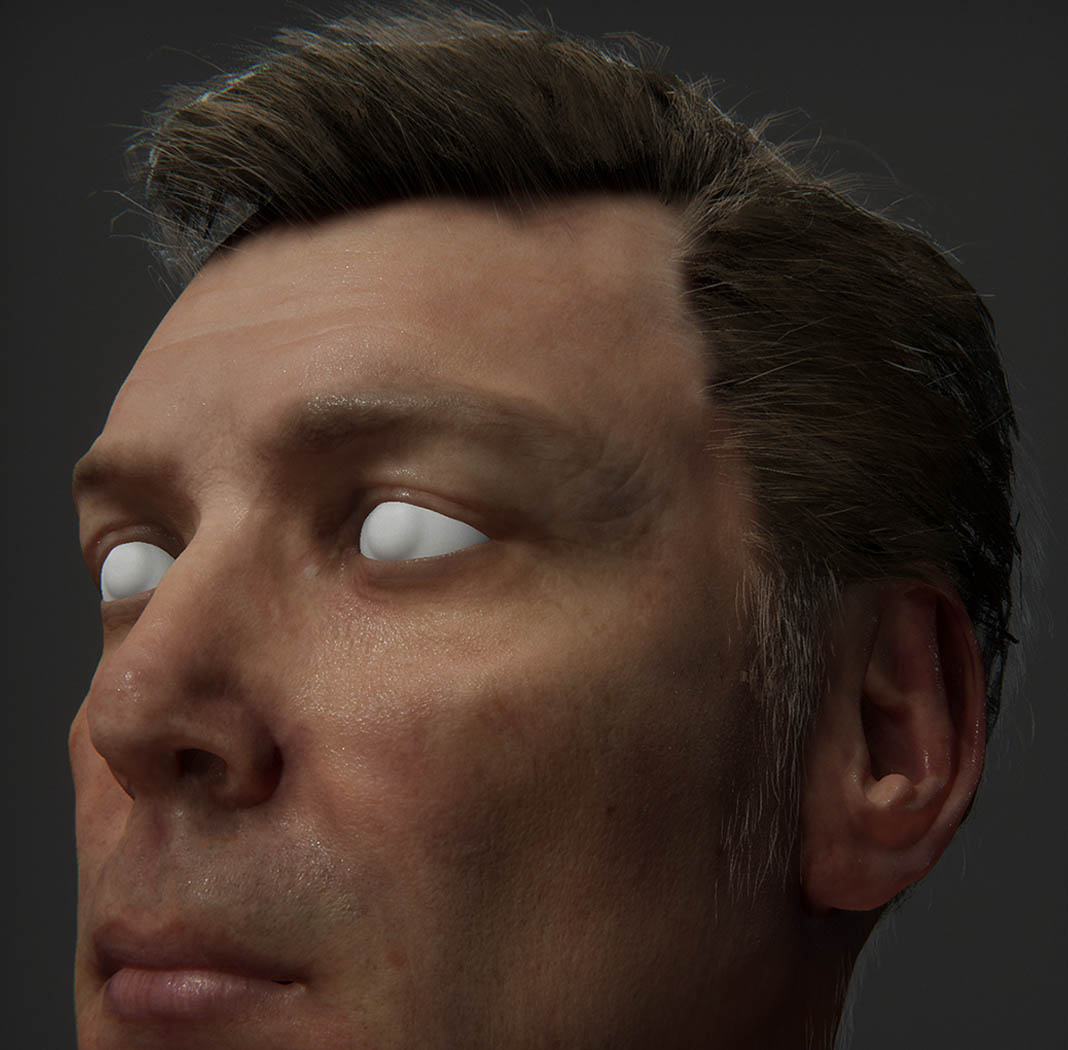
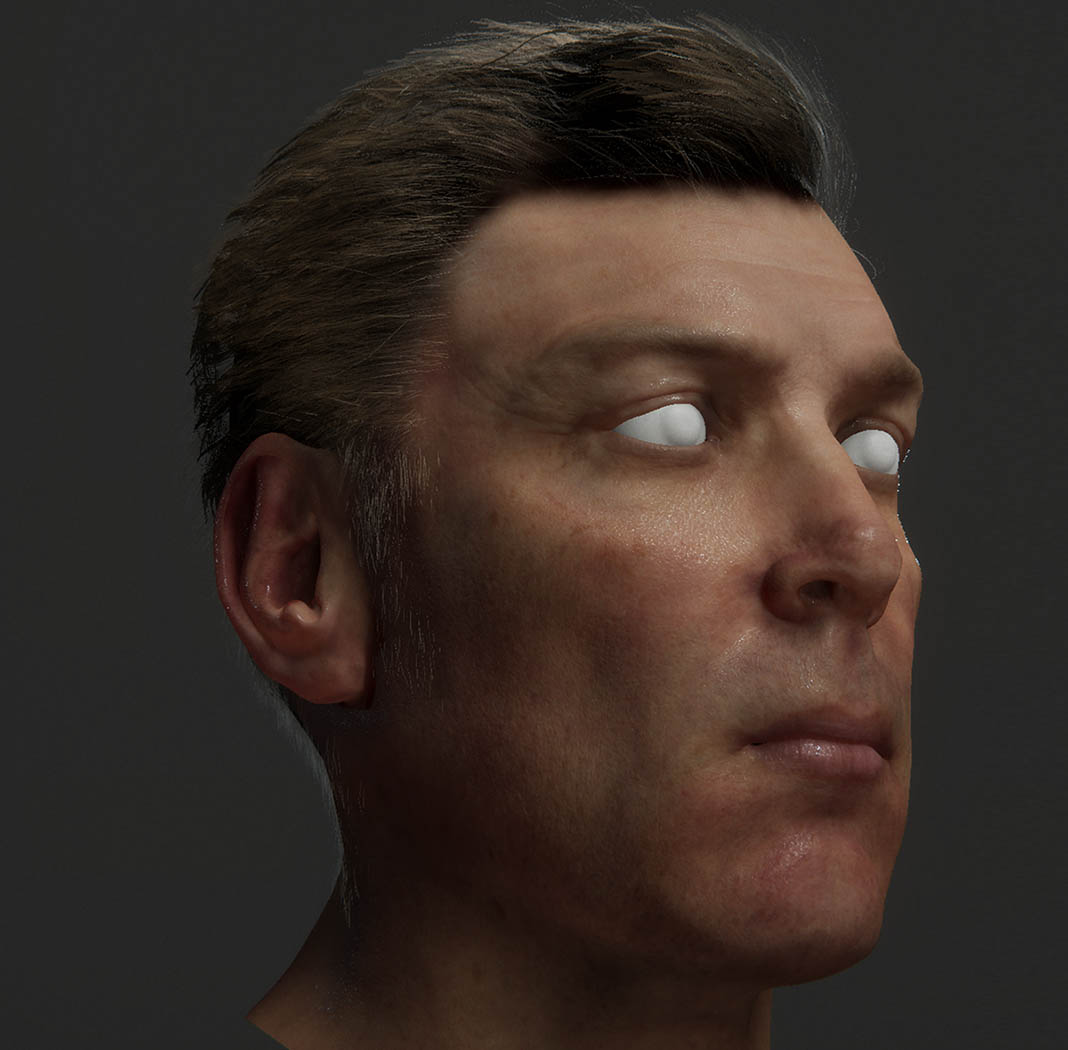

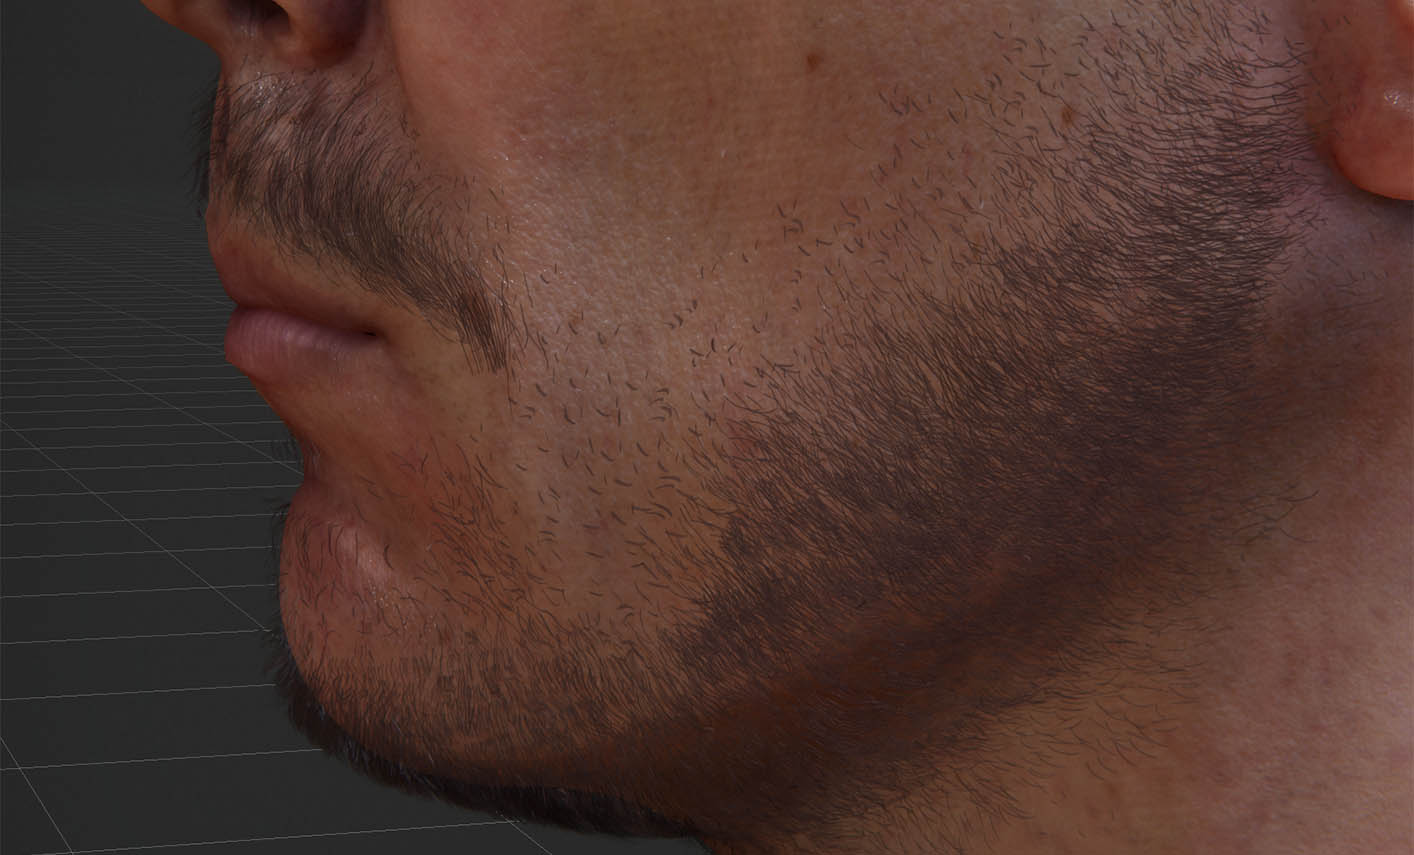
I used a sample MetaHumans Facial Hair example as a starting point for the beard and mustache but modified this to be fuller and match topology. I created three layers of facial hair including a stubble, beard, and mustache layer that could all be turned on and off separately.
I used the move sculpting tool in Maya to hand place facial hair cards but really wish that Autodesk would make a Hair sculpting tool that allows the user to move many hair cards at once. Eyebrows and Lashes were placed in the same fashion and tweaked to ensure fullness.
Once again, I used Unity’s HDRP Hair shader to check visual quality as I worked.